Virtual Machine Setup
Overview
All labs and programming projects in this course will be done on Linux, in order to prepare you for future CS courses (and employers) that use a diversity of computing systems. Your first assignment in class is to build your own Linux system. We will do this together in class before the first lab. There are two options available to you:
- Run a Linux virtual machine on your personal computer by using software like VMWare Workstation 14 Player (PC-Free for non-Pro version) or VMWare Fusion (MAC-$$).
- Requires a computer with at least 3GB of RAM (to be comfortable), and 20+GB of disk space
- Note: Oracle VirtualBox is not recommended due to its erratic behavior during the memory performance lab. Use it only if VMware workstation gives too much trouble.
- Dual-boot your personal computer (Linux + your existing operating system)
- Requires a less capable computer than the virtual machine option, because only one operating system will be active at a time
- No laptop / no computer? Contact the instructor for alternate methods to complete ECPE 170
There are many different variants of Linux available, called "distributions". Examples include "RedHat", "Ubuntu", "Debian", "Mint", "openSUSE", and many others. While the core operating system functionality (the "kernel") remains the same, each distribution bundles the kernel with a different mix of software.
The chosen Linux distribution for ECPE 170 is:
Ubuntu 16.04 Long-Term Support (LTS) edition, released July 2016.
Pick the **64-bit** version of the operating system.
(Note: The 32-bit version is **strongly discouraged** for ECPE 170 labs. You will encounter subtle yet annoying differences, such as the specific location of files, and the specific Valgrind output files produced)
Alternate Linux distribution for older computer systems: Xubuntu 16.04 Long-Term Support (LTS) edition
Do you have a different favorite Linux distribution? All of the projects use an extremely common set of tools, and thus should work across any and all Linux distributions of a recent vintage. You are more than welcome to use any distribution you see fit, but be warned that you are responsible for fixing any problems that arise!
OS Installation
If you already have a functioning Linux distribution installed on your laptop, then your homework is complete. If not, read on to install Ubuntu inside a virtual machine.
VMWare Player is a virtual machine manager that makes it possible for you to run multiple operating systems on your computer at the same time.
- Download the (free, non-Pro) VMWare Workstation 12 Player installer. Or, if you already have VMWare Fusion (Mac) or VMWare Workstation (PC), feel free to use that. Oracle VirtualBox is not recommended.
Ubuntu is a popular Linux distribution.
- Download the .iso (disk image) file containing the installer for Ubuntu Linux, version 16.04 LTS, 64-bit edition
(there's no need to be bleeding-edge in this class, and the slightly older "Long Term Support" version works better in a virtual machine)
Step 1: Install VMWare Workstation 14 Player
Step 2: Install Ubuntu Linux into VMWare Player
- Create a new virtual machine that has been allocated 2GB of RAM, 20GB of disk space, and 2 CPU cores.
- Point VMWare Player to the installer .iso file for Linux
- Let the installer run!
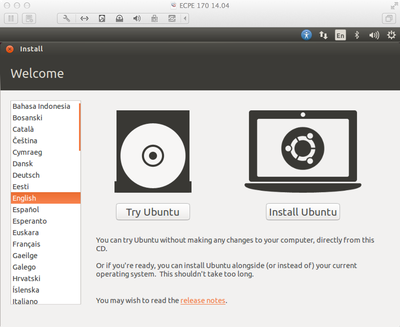
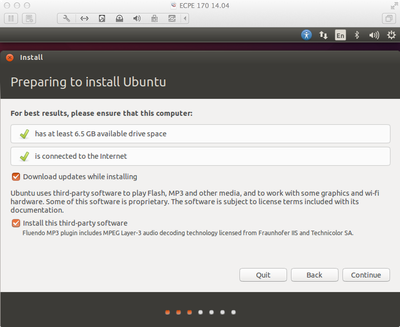
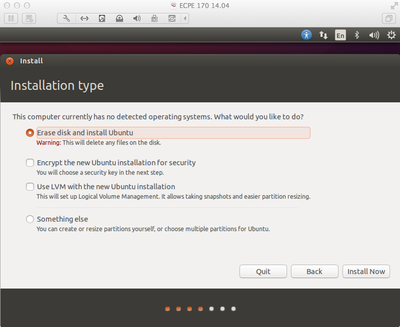
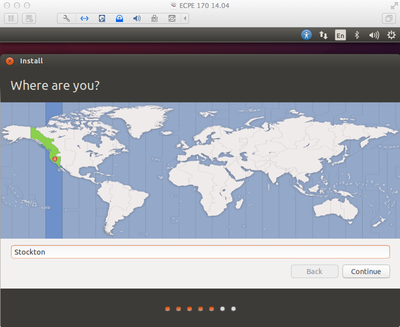
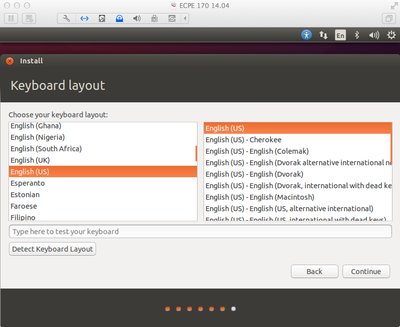
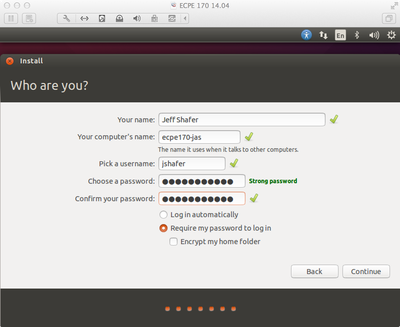
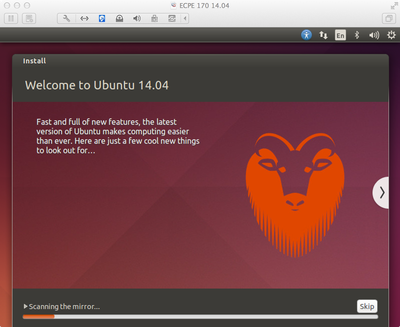
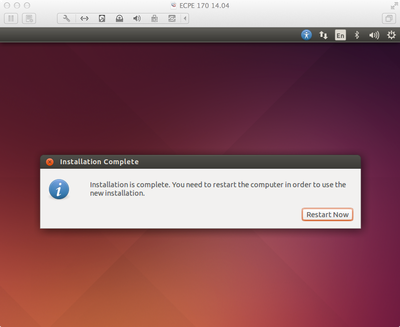
The Ubuntu installer is very simple. Here are some sample screen snapshots from Ubuntu 14.04 as I worked my way through the installer on my laptop. (Using VMWare Fusion on Mac). If you let VMWare Player do the "EZ Install" option, you may not see all of these screens.
|
Select "Install Ubuntu" |
Check "Download Updates" and "Install 3rd-party Software" |
|
Select "Erase Disk" - Don't worry, if you're using VMWare or VirtualBox, Warning: If you're dual booting, you'll want to select a different option |
We're in Stockton... |
|
English is fine... |
Enter your full name plus pick a username and password |
|
Installer splash screen |
Reboot to complete installation |
|
Congrats, Ubuntu is installed! |
Application Installation
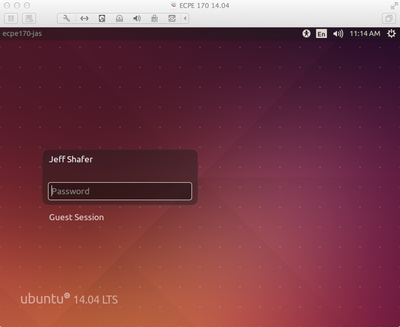
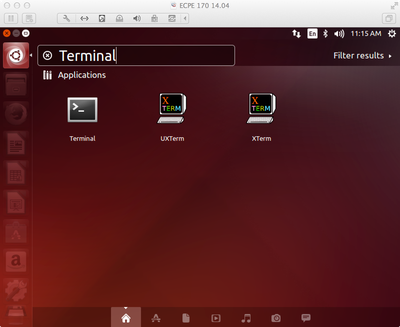
In Ubuntu, login and launch the command prompt (aka Terminal). The keyboard shortcut is <CTRL><ALT><T>. Or, you can search for "Terminal" by clicking on the Dash button in the upper-left corner (i.e., the Ubuntu equivalent of the Windows "start" button).
For the rest of this course, commands to enter at the terminal are going to be given in the following format:
unix> This is the command that you should enter
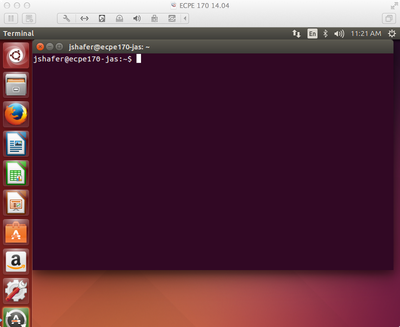
The "unix>" part of the line should not be typed in, and it will not look the same on your computer. Rather, it might look something like this: username@computername:/current-directory$, i.e. a combination of your username, computer name, and the current directory you are in. Thus, it will be constantly changing as you work! To simplify tutorials, this is written as unix>
|
Locating the Terminal tool |
Terminal (command prompt) ready for use! |
The following commands refer to installing software on the computer. Let's break these commands apart:
- sudo: sudo allows you (a regular user) to run a command as an Administrative ("root") user by typing your password. Everything that comes after sudo is the command to run as an Administrative user. Administrative access is required to install software.
- apt-get: apt-get is a utility that can add or remove software programs. Anything that comes after apt-get changes the behavior of this utility: Are we installing or removing software? What specific software?
Update all programs on the system to the latest versions. The 'update' commands gets the list of latest programs, and the 'upgrade' command downloads and installs them. There may be a lot of files to download!
unix>  sudo apt-get update
(Enter your password so that sudo can run the command as Administrator)
unix>  sudo apt-get upgrade
(Type Y for YES  when prompted to begin installation)
unix>  sudo reboot
When the virtual machine finishes rebooting, launch the command prompt again via CTRL-ALT-T.
Install some software that we will use later in the semester:
- mercurial is a version control system
- strace is a utility that intercepts and logs calls that applications make into the operating system
- valgrind is a utility that monitors program memory usage and looks for leaks and other bugs
- kcachegrind is a GUI display utility for valgrind traces
- ttf-mscorefonts-installer includes some Microsoft fonts frequently used
- python-matplotlib installs a Python-based math / graphing engine
- ghex is a file viewer (at the byte level)
- g++ is a C++ compiler
- iotop is a monitor for disk activity
- gedit is a text editor. It comes with Ubuntu, but I include it here for anyone running a different Linux distribution.
- libreoffice is a Office suite (similar to Microsoft office). It comes with Ubuntu, but I include it here for anyone running a different Linux distribution.
unix>  sudo apt-get install mercurial strace valgrind kcachegrind \
ttf-mscorefonts-installer python-matplotlib ghex g++ iotop \
gedit libreoffice
Note: For the font package, use the <TAB> key and <ARROW> keys to select between the various options on the text-based installer.
On the assumption that 95% of the class will use the GEdit text editor, make three changes to the editor preferences:
- Disable automatic backup files (because this will litter your directory with backup copies of files where the filename ends in a tilde (~) character).
- Enable line numbers to simplify program debugging later.
- Enable auto-indenting (to preserve the current level of indenting).
(These could also be set via the GUI preferences inside of GEdit, but what fun would that be?)
unix>  gsettings set org.gnome.gedit.preferences.editor create-backup-copy false
unix>  gsettings set org.gnome.gedit.preferences.editor display-line-numbers true
unix>  gsettings set org.gnome.gedit.preferences.editor auto-indent true
Test your virtual machine: Can you copy and paste between your normal OS and Linux? (i.e. can you copy one of the commands above and paste it into the Linux Terminal?) Can you resize the virtual machine window or set Linux to full-screen mode, and have the guest OS resize to take up the new available space?
- If Yes: Your virtual machine is ready for use. Enjoy!
- If No: See Troubleshooting Tips below
Troubleshooting Tips for VMWare Player / Fusion
The "EZ Install" option should have already installed the necessary drivers/tools for VMWare Player or Fusion to improve the performance and integration of your new virtual machine. But, if you have problems, you can try installing the open-source version of the tools manually.
unix>  sudo apt-get install open-vm-tools open-vm-tools-desktop
(Enter your password so that sudo can run the command as Administrator)
unix> sudo reboot
Or, as a fall-back position, you could try manually re-installing the VMWare-provided tools:
- Find the tools installer:
- For Player: Click on Player->Manage->Reinstall VMWare Tools...
- For Fusion: Look for a similar menu option to Reinstall VMWare Tools.
- You should see a folder appear in Linux with a file: VMWareTools-######.tar.gz
- Right-click on that .tar.gz compressed archive file and choose "Extract To...". Select the Desktop as the destination and click Extract.
- Open the Terminal via CTRL-ALT-T
- We want to run the script vmware-install.pl in the folder you just created as the root (Administrator) user. Use the following command:
unix>  sudo ~/Desktop/vmware-tools-distrib/vmware-install.pl
(Enter your password so that sudo can run the command as Administrator)
Just keep hitting ENTER until it finishes. All the default choices should be safe.
Do the graphics look "funny" after you log into Ubuntu? (Missing/blurred menu bar at top and program icons on the right?) It may be that the graphics card or driver on your computer is not fully compatible with GPU acceleration. Fortunately, that feature can be disabled.
- Shut down the virtual machine
- In VMWare Player, right-click on your virtual machine and choose "Virtual Machine Settings"
- Select "Display"
- Make sure the "Accelerate 3D Graphics" is NOT checked.
- Select "OK".
- Launch your virtual machine again. Do the menu bar and program icons appear now?
Does the network in the host OS work, but networking in the guest OS is broken? Can you ping to an IP address (8.8.8.8) but can't ping to a hostname? (google.com). This weird error has affected a small subset of students in the past. Try specifying a fixed DNS server to use instead of relying on DHCP autoconfiguration. Google Public DNS is a good choice that will work both on and off campus. Use the GUI to specify DNS servers of 8.8.8.8 and 8.8.4.4.
Troubleshooting Hardware Virtualization
In the event of BIOS updates, the hardware virtualization may be disabled. This may interfere with your Workstation/VirtualBox. The solution is simple: enable hardware virtualization.
Troubleshooting Tips for VirtualBox
Manually install drivers/tools for VirtualBox. These improve the performance and integration of your new virtual machine.
unix>  sudo apt-get install virtualbox-guest-dkms
(Enter your password so that sudo can run the command as Administrator)
(Type Y for YES when prompted to begin installation)
unix> sudo reboot
Also, ensure that "Shared Clipboard" is enabled. Go to Settings (for your specific virtual machine) -> General -> Advanced -> Shared Clipboard and set it to Bidirectional.

