Project 2 - Eclipse Setup
Installation
- Download and install the latest 4.3.x "Kepler" version of Eclipse IDE for Java Developers from http://eclipse.org. Note that the "Standard" edition will not have all the required features.
- Download and install the latest 1.7.x version of the Java SE Development Kit (JDK) from Oracle. Note that the JRE (Java Runtime Environment) is *not* sufficient - you actually need to be able to compile Java code.
- Install Eclipse add-ons
- Choose Help->Install New Software
- Choose Work with: Kepler (http://download.eclipse.org/releases/kepler) (assuming that you have the "Kepler" version of Eclipse installed).
- Check the installation box next to the following packages:
Database Development -> Data Tools Platform Enablement Extender SDK
Database Development -> Data Tools Platform Extender SDK -
Select next/finish and accept the licenses. Allow the installation to complete, and restart Eclipse.
- Install AWS Toolkit for Eclipse.
- Choose Help->Install New Software.
- Click the "Add" button next to "Work with". Enter AWS for the name and http://aws.amazon.com/eclipse/ for the location, and click OK.
- Check the installation box for the entire AWS Toolkit for Eclipse. Then, expand the list and uncheck the "AWS SDK for Android" - we don't need that one, and it has additional installation requirements.
-
Select next/finish and accept the licenses. Allow the installation to complete, and restart Eclipse.
- Configure AWS Toolkit
- Open the "Java" perspective in Eclipse
- Local the orange AWS button (
 ) on the toolbar. Click on the dropdown arrow to the right of it, and choose "Preferences"
 - Enter the following information for the default account:
- Account Name: <Check file in Sakai drop-box for your username>
- Access Key ID: <Check file Sakai drop-box>
- Secret Access Key: <Check file in Sakai drop-box>
- Click OK when finished
Demo Program 1 - AWS Overview
- In Eclipse, choose File->New->Project..., and then AWS -> AWS Java Project. Click Next.
- Enter a project name: AWS-Demo1
- Select the login account you previously entered for yourself.
- Check the box next to AWS Console Application. Click Finish.
- Browse the code for a bit: Package Explorer Panel -> AWS-Demo1->src->default package->AwsConsoleApp.java. You should see demo code that performs the following actions:
- Prints the number of EC2 availability zones and instances running
- Print the number of SimpleDB tables and records contained within
- Print the total number of S3 buckets, and objects contained within
- Tip: The S3 stage of the demo takes a LONG TIME to run because of all of the files produced in our earlier project. Add this one line of code in order to see current progress:
System.out.println("Examining bucket: " + bucket.getName()); // ADD THIS LINE INSIDE THE FOR-LOOP
ObjectListing objects = s3.listObjects(bucket.getName()); - Finally, run the demo! Choose Run->Run.
- Tip: if Eclipse prompts you, you want to choose "Java Application", and then "AWSConsoleApp" (out of all of the other classes that could be run in the demo project)
Your output should look like this:
===========================================
Welcome to the AWS Java SDK!
===========================================
You have access to 5 Availability Zones.
You have 0 Amazon EC2 instance(s) running.
You have 3 Amazon SimpleDB domain(s)containing a total of 45653 items.
Examining bucket: ac2-commoncrawl-tutorial
Examining bucket: adominguez-commoncrawl-tutorial
Examining bucket: eescamilla-commoncrawl-tutorial
Examining bucket: glick-commoncrawl-tutorial
Examining bucket: jjohnson68-commoncrawl-tutorial
Examining bucket: jmcgill-commoncrawl-tutorial
Examining bucket: joreilly-commoncrawl-tutorial
Examining bucket: mendez-commoncrawl-project
Examining bucket: mendez-commoncrawl-tutorial
Examining bucket: mmorelli-commoncrawl-tutorial
Examining bucket: nubemdolor-common-crawl-tutorial
Examining bucket: oreilly-commoncrawl-tutorial
Examining bucket: pjhodson-commoncrawl-tutorial
Examining bucket: rsnider-commoncrawl-tutorial
Examining bucket: ssnow-commoncrawl-tutorial
Examining bucket: ssnow-mmorelli
Examining bucket: teststudent-common-crawl-tutorial
Examining bucket: tlindberg-commoncrawl-tutorial
Examining bucket: vegaj-commoncrawl-tutorial
You have 19 Amazon S3 bucket(s), containing 307687 objects with a total size of 88003060166 bytes.
Demo Program 2 - DynamoDB
- In Eclipse, choose File->New->Project..., and then AWS -> AWS Java Project. Click Next.
- Enter a project name: AWS-Demo2
- Select the login account you previously entered for yourself.
- Check the box next to Amazon DynamoDB Sample. Click Finish.
- Browse the code for a bit: Package Explorer Panel -> AWS-Demo2->src->default package->AmazonDynamoDBSample.java. You should see code that creates a database table and adds a few dummy records to it.
- Important! We can't all use the same table name in the database! Change the tableName variable from "my-favorite-movies-table" to something unique. Perhaps "YOURNAME-Demo2"?
- Finally, run the demo! Choose Run->Run.
- Tip: if Eclipse prompts you, you want to choose "Java Application", and then "AmazonDynamoDBSample" (out of all the other classes that could be run in the demo project)
Your output should look like this:
Created Table: {AttributeDefinitions: [{AttributeName: name,AttributeType: S}],TableName: Shafer-Demo2,KeySchema: [{AttributeName: name,KeyType: HASH}],TableStatus: CREATING,CreationDateTime: Sat Mar 15 23:58:36 PDT 2014,ProvisionedThroughput: {NumberOfDecreasesToday: 0,ReadCapacityUnits: 1,WriteCapacityUnits: 1},TableSizeBytes: 0,ItemCount: 0,}
Waiting for Shafer-Demo2 to become ACTIVE...
Table Description: {AttributeDefinitions: [{AttributeName: name,AttributeType: S}],TableName: Shafer-Demo2,KeySchema: [{AttributeName: name,KeyType: HASH}],TableStatus: ACTIVE,CreationDateTime: Sat Mar 15 23:58:36 PDT 2014,ProvisionedThroughput: {NumberOfDecreasesToday: 0,ReadCapacityUnits: 1,WriteCapacityUnits: 1},TableSizeBytes: 0,ItemCount: 0,}
Result: {}
Result: {}
Result: {Items: [{fans={SS: [James, Sara],}, name={S: Bill & Ted's Excellent Adventure,}, year={N: 1989,}, rating={S: ****,}}],Count: 1,ScannedCount: 2,}
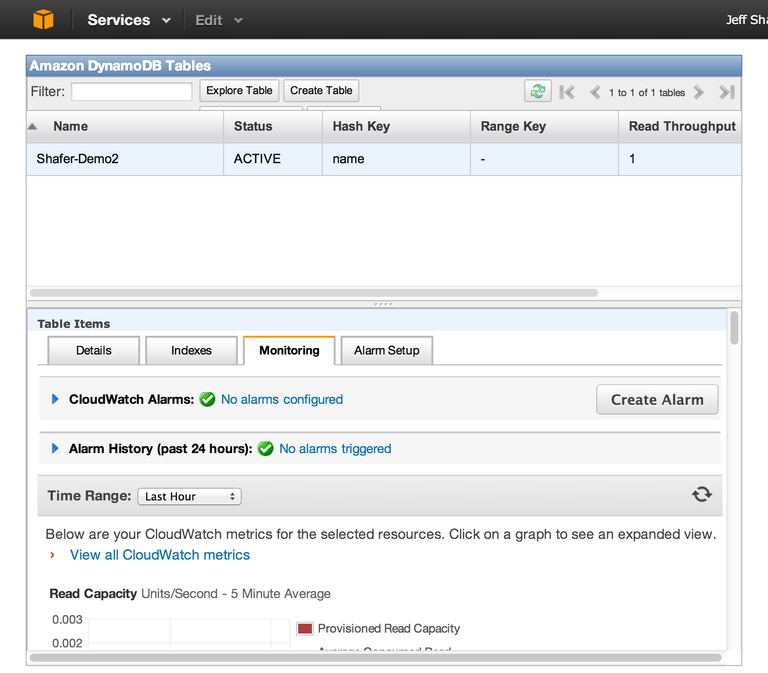
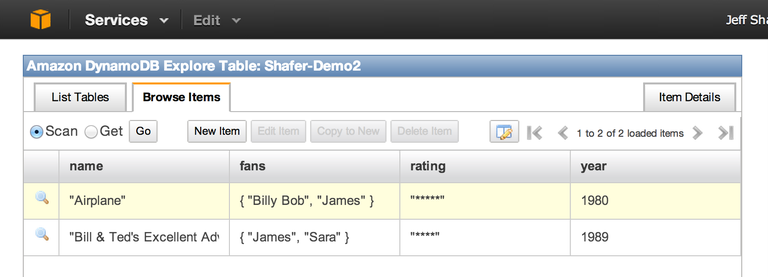
Finally, log onto the AWS website and select the DynamoDB tool. Then, from the top menu, select the US-West (Oregon) region, which the demo code defaulted to use for your database. You should see your table in the list, and be able to open the table and view the newly-created entries.


Other Demos
The SDK includes a number of other project demos that might be useful, including:
- AmazonS3
- AmazonS3TransferProgress (to see how fast a file upload is progressing)
- AmazonSimpleDB (this is no longer part of the SDK demos for some reason, so I'm including the code here)
- Amazon Simple Queue Service Sample
